
| Written by
Elissa K. Miller |  Back
Back

Doubleknot provides two different ways to present registration forms that are assigned to specific registrant types or to all registrants:
 In the example below, the same release form is displayed “inline” as part of registrant attributes. Because the release fields are displayed beneath each registrant’s name, the registration owner can quickly and easily complete the information for each registrant without the need to click through multiple form pages to provide the necessary waivers.
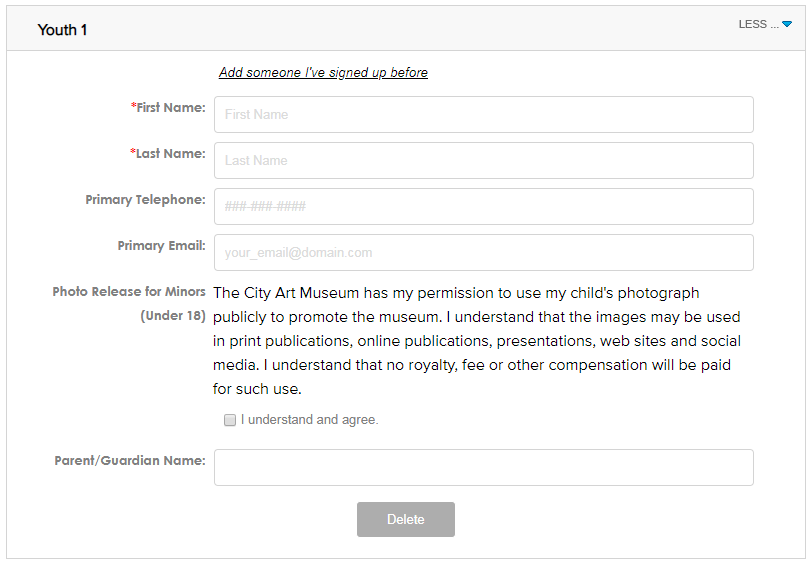 Advanced features like adding optional costs and using conditional logic are still available for forms displayed inline with registrant attributes. Here’s a quick overview of how to set up an inline form.

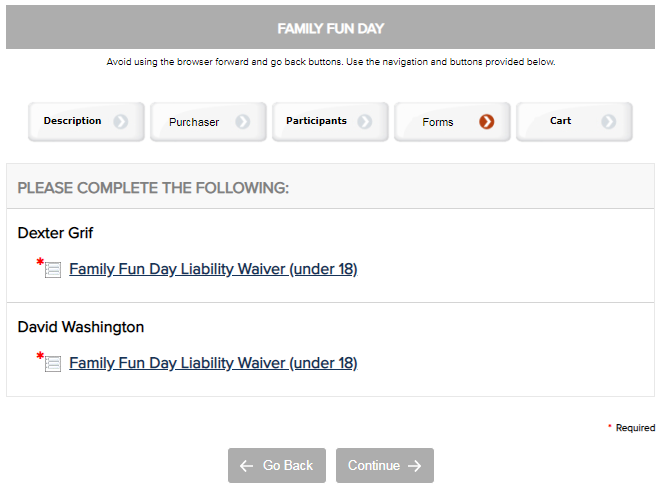
- As standalone forms: These forms are displayed on their own pages during the registration process. This option is best suited for long forms and questionnaires.
- As inline forms: These form fields are displayed on the page where visitors identify registrants. The correct form fields for each registrant type will be displayed beneath the registrant attribute items. (Registrant attributes are the required fields (like name and email) and optional fields that you choose to display during registration.)
Using a standalone form creates extra clicks for the purchaser
In the example below, the same release form is displayed “inline” as part of registrant attributes. Because the release fields are displayed beneath each registrant’s name, the registration owner can quickly and easily complete the information for each registrant without the need to click through multiple form pages to provide the necessary waivers.
Displaying the same form inline with registrant attributes streamlines the entire registration process
Advanced features like adding optional costs and using conditional logic are still available for forms displayed inline with registrant attributes. Here’s a quick overview of how to set up an inline form.
- Create the form, and assign it to the event.
- Select Each Registrant.
- If the form should only be assigned to a specific registrant type, select the registrant type.
- Select Display as Registrant Attributes.
- Click Done to save your changes.
Assigning an inline form to all Youth registrants