| Written by
Doubleknot Support |  Back
Back

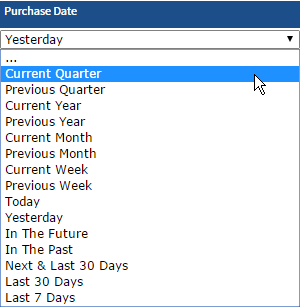
This article contains instructions for creating ad hoc reports in the new Izenda interface. In an ad hoc report, you can apply a range of filters to display only the data that you're interested in, and print, export or email the results. NOTE: The filters you apply using these instructions are not permanently saved. To permanently save changes as a custom report, use the report designer (click the pencil icon at the top of the page). Click here for instructions on using the powerful report design features. Reports that use the Izenda interface will automatically open in a mode where you can apply the most common filters like date range, amount, etc. In the following illustration, the default filter is by Purchase Date.
Default filter for a report

- To select or enter parameters for a filter, follow these steps:
- If the filter displays a menu, click the displayed menu and select the desired information (see image below).
- If the filter displays a field, enter the text or data (such as a date in mm/dd/yyyy format) that you want to apply.
- Click Update Results. Only the results that match your parameters will be displayed.
Changing the Purchase Date filter to Current Quarter
- Click the blue + at the right of the existing filters. A new blank filter will be displayed.
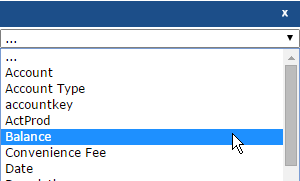
- In the menu below the blue border, select the data field that you want to use in the filter.
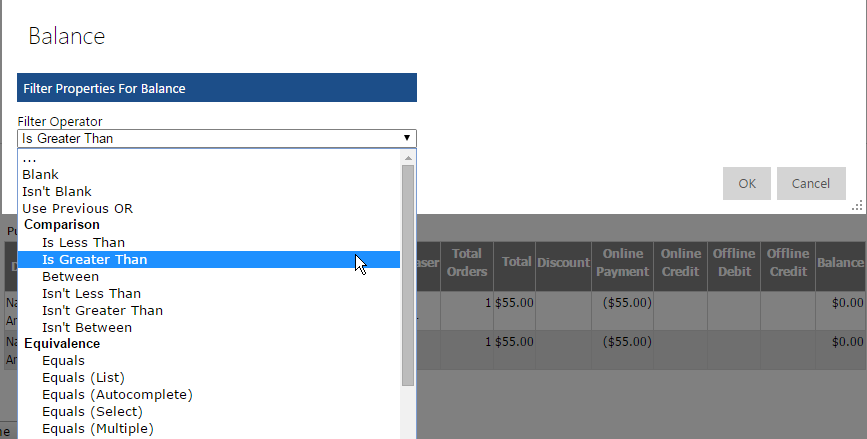
- Hover the mouse over the blue filter, and click the Settings icon (a gear). The Filter Properties dialog box will be displayed.
- In the Filter Operator menu, select the operator for the filter. For example, if you’re setting a filter for Balance, you can select Is Greater Than to limit the results to those with a balance greater than the amount you enter.
- Click OK to return to the report.
- Enter or select data in the filters, and click Update Results.
Adding a filter that applies to the Balance data field
Setting the operator for the new Balance filter
To modify an existing filter, follow these steps:
- Hold the mouse over the blue title bar, and click the Settings icon (the gear). The Filter Properties dialog box will be displayed (see above).
- In the Filter Operator menu, select the operator for the filter. For example, if you’re setting a filter for Balance, you can select Is Greater Than to limit the results to those with a balance greater than the amount you enter.
- Click OK to return to the report.
- Enter or select data in the filters, and click Update Results.
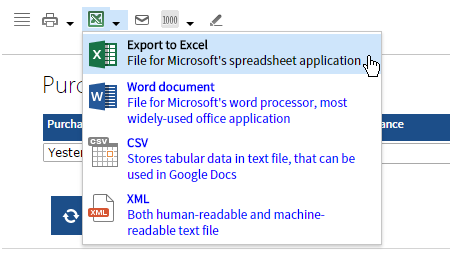
Saving the updated results as an Excel document